

Tissue Paper Flowers! So simple to make and so beautiful!
Have you ever made tissue paper flowers? The first time I ever made this simple and easy craft was when I was a Girl Scout in Puerto Rico. We learned how to make them during a troop meeting and I quickly became obsessed! In fact, I went home and grabbed some pipe cleaners and a box of Kleenex and started making more. I made so many that I used the entire box of Kleenex and my mother yelled at me before I could grab a second Kleenex box!
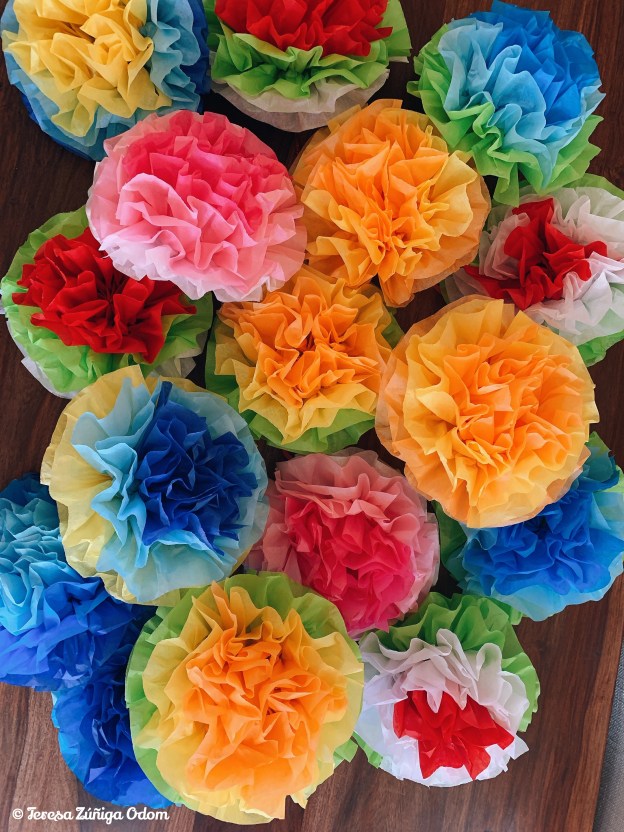
Honestly though…I can’t think of an easier and more colorful and budget friendly way to decorate for a party or event. I remember several years ago when the HICA (Hispanic Interest Coalition of Alabama) team made a ton of these flowers as centerpieces for an event because the event budget was so tight. I still have the ones that were on my table and they are decorating a Talavera vase in my powder room.


For Fiesta this year, my friend and fellow board member, Vanessa Vargas and I made a video on how to make these quick and easy decorations. I’m linking the video to the bottom of this post so you can see how it’s done but I’m also going to give you a photo by photo tutorial here.

Items you will need to make tissue paper flowers
You will only need three items to make these lovely tissue paper flowers:
- Various colors of tissue paper (I used 20 x 26 inch paper bought in a package at a craft store)
- Pipe cleaners (the sparkly kind are fun!)
- Scissors
Let’s get started!
Step 1 – To begin, select about 6 sheets of tissue paper. The more you use the fuller the flowers will be. I like to use 6 because this amount is manageable. After you pick your colors, place them one on top of the next.

Step 1
Step 2 – Make sure the ends of the paper are in line. Then you can begin folding the paper back and forth about 1-inch in an accordion fold. Keep folding until you get to the end of the sheets.


Step 3 – Because I like to use the large sized tissue paper, I then will cut the accordion folded sheets in half in order to make two flowers.


Step 4 – Take the pipe cleaner and place it 1/3 of the way under the folded tissue paper. Then fold it over to secure the tissue paper. You should have enough pipe cleaner to twist slightly.


Step 5 – Once folded you are ready to start the fun part! Begin very carefully pulling each sheet of tissue paper up, all the way around, one after the other. You will want to fluff each sheet as you finish to give the flower body.


Step 6 – Once the last tissue paper is pulled up, you will want to fluff a bit to reveal a beautiful blossom.

Step 7 – Admire your beautiful flower!
NOTE: There is one variation to these steps and that is during step 4. You can take your scissors and cut the ends of the folded tissue paper in various ways to give the flowers a different look once it is fluffed out. I do like this look but my personal preference is the smooth look without cutting the ends.

These flowers were cut after the accordion fold was completed. You can either cut the sides of the tissue paper or cut a “v” out to make different shapes like the ones here.
My Fiesta team used these flowers this fall to decorate several Facebook live events we had and they added the perfect dimension to our Fiesta theme! They are so simple yet they add just the right amount of Latino flair!
Here is the link to the Fiesta video I did showing how to make these flowers. If you make any, let me know. I’d love to see them!
Tissue Paper Flower video: https://www.facebook.com/FiestaBham/videos/334786707623746

That’s Awesome !
LikeLike
Thank you! Really fun to make!!!
LikeLike